Wednesday, January 25, 2017

The one in which I try something new...

Yes, those are bags of LEDs. For some time, I've been itching to build a model with lighting but I've always felt apprehensive about it because electricity is not my strong suit! However, after pouring over websites and videos about wiring LEDs, I've decided to give it a go because I have a big project coming up soon that I think will look fantastic with lights. In the meantime, I have model on the way that will serve as a testbed for my new electrical endeavors.

Friday, January 20, 2017

Showcase: Bandai Slave I (1/144 scale)

 
Bandai Slave I (1/144 scale); completed in Tamiya and Vallejo acrylics, MIG enamels, and Secret Weapon Miniatures pigments. The stand is from the Fine Molds version of this model.

Thursday, January 19, 2017

WIP: Bandai Slave I (1/144 scale), Part 5

I sprayed the first coat of green, which is the going to be the darker of the two on the hull, over the entire area. It's essentially the Tamiya equivalent of RLM 02 and I made it by mixing RLM Grey (XF-22) and Khaki (XF-49) in a 1:1 ratio with a tiny extra bit of XF-22 added.
Using the studio model as a guide, I applied masking fluid with torn pieces of sponge. Give the nature of the original paint job, no model will ever match it exactly, however, the goal here was to just get close. This color is Tamiya J.A. Grey (XF-14) with a tiny bit of Deck Tan (XF-55) added to it.
After I painted the dark green panels with J.N. Green (XF-11), I did a quick dry fit of the major hull pieces just to see how it looked. I thought that the RLM 02 color was a little dark so I sprayed the entire hull, sans the dark green pieces, with a very thin coat of J.A. Grey to tone them down.
I weathered the wing supports with a handful of MIG enamel washes stippled on with a sponge and then blended into the surface. This was probably overkill because they are barely visible one the "fenders" are added and the entire assembly is inserted into place.
The panel lines were done with a mix of MIG Dark and Neutral Wash, and once everything fully dries it will be sealed with some varnish and further weathering will begin. This will mainly consist of some filters and streaking on the hull, along with some pigments.

Tuesday, January 17, 2017

WIP: Bandai Slave I (1/144 scale), Part 4

I worked on the fenders last night. The one on the left was painted with Tamiya J.A. Gray (XF-14) and had liquid mask applied to mimic the weathering on the studio model. It was then given a coat of J.N. Green (XF-11) mixed with a touch of Field Grey (XF-65). The one on the right was painted with a witch's brew of Tamiya greens and had liquid mask splattered on it by dipping a piece of torn foam in liquid mask and using air from my airbrush to apply it. A coat of the same green color as the other fender was applied and the masking was removed. The underlying green was a little too bright so I sprayed some heavily thinned dark green over it to tone it down.

Monday, January 16, 2017

WIP: Bandai Slave I (1/144 scale), Part 3

I wasn't happy with the front skirt but I also didn't really want to change it. After sleeping on it last night, I woke up and was content with how it turned out. Not happy, but willing to leave it as is. I then spent the next twelve hours at work and my dissatisfaction with it grew throughout the day. After I got home and had a lovely dinner with my wife, I head to the studio and decided to fix it. Needless to say, I am much more pleased with the end result. I used the same grey-green base color, applied a layer of liquid mask, sprayed a coat of pink made with Tamiya Pink (X-17) mixed with a little Tamiya Deck Tan (XF-55), applied another layer of liquid mask, and finally gave it a coat of the same red-brown from the first go around only with a tiny bit of Flat Red (XF-7) added.

Sunday, January 15, 2017

WIP: Bandai Slave I (1/144 scale), Part 2

Starting with the base coat of pale green, the "correct" color is supposed to be Tamiya J.A. Grey (XF-14). This was a little too green for my taste, I mixed in some Tamiya Medium Grey (XF-20) and Flat White (XF-2) in a ratio of 3:2:2 to get this wonderful pale green. Also, I took this photo while experimenting with a new 50mm lens I bought for my Nikon. I would like to take all of my work in progress shots like this but it's much easier to grab my iPhone and snap a few quick pictures.
I managed to get most of the front skirt painting done last night. It's pretty much done except for a couple of black panels on the top grey section. All and all, I'm not entirely happy with it. I decided to use chipping fluid instead of liquid mask applied with a sponge. It's not bad, it's just not the finish I was aiming for. I guess it will be cool because the chipping on the skirt is going to be different than the hull, where I will be using liquid mask. The colors I used were Hull Red (XF-9) and Buff (XF-57) for the red, Pink (X-17) for the chipping, German Grey (XF-63) over Medium Grey (XF-20) for the grey panels, and Vallejo Model Air Tank Brown (71.041) for the brown panel. After this picture was taken, I managed to get a panel line wash on with MIG Dark Wash enamel. Once that is sealed in with some matte varnish, I'll move on to more weathering.

Saturday, January 14, 2017

WIP: Bandai Slave I (1/144 scale), Part 1

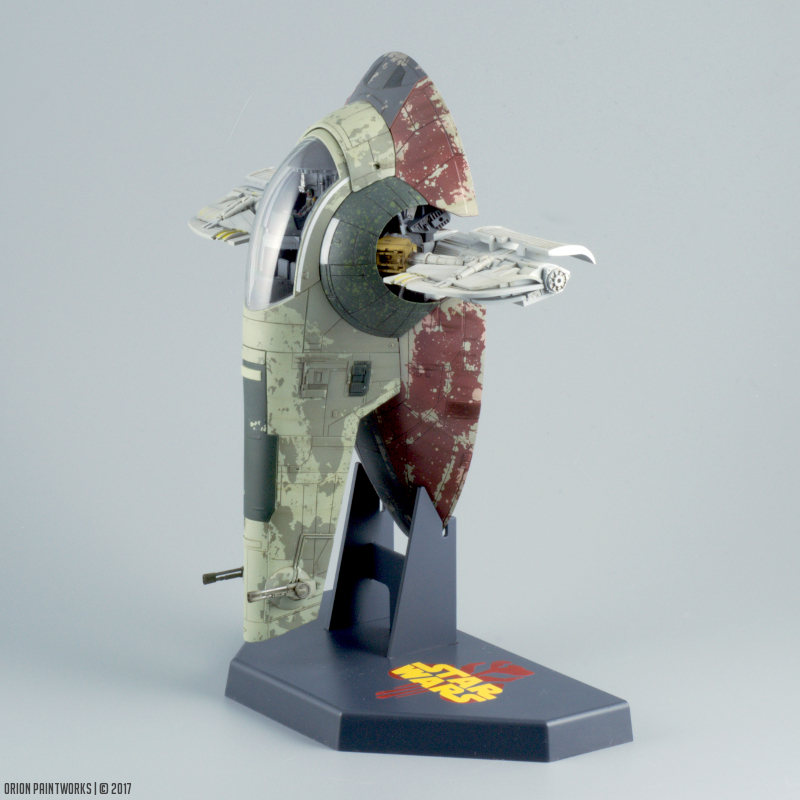
I've been longing to build a model of one of the coolest Star Wars ships of all time, Boba Fett's Slave I. Like all Bandai kits, this 1/144 scale version of his iconic ship comes premolded in various colors but unlike most Bandai 
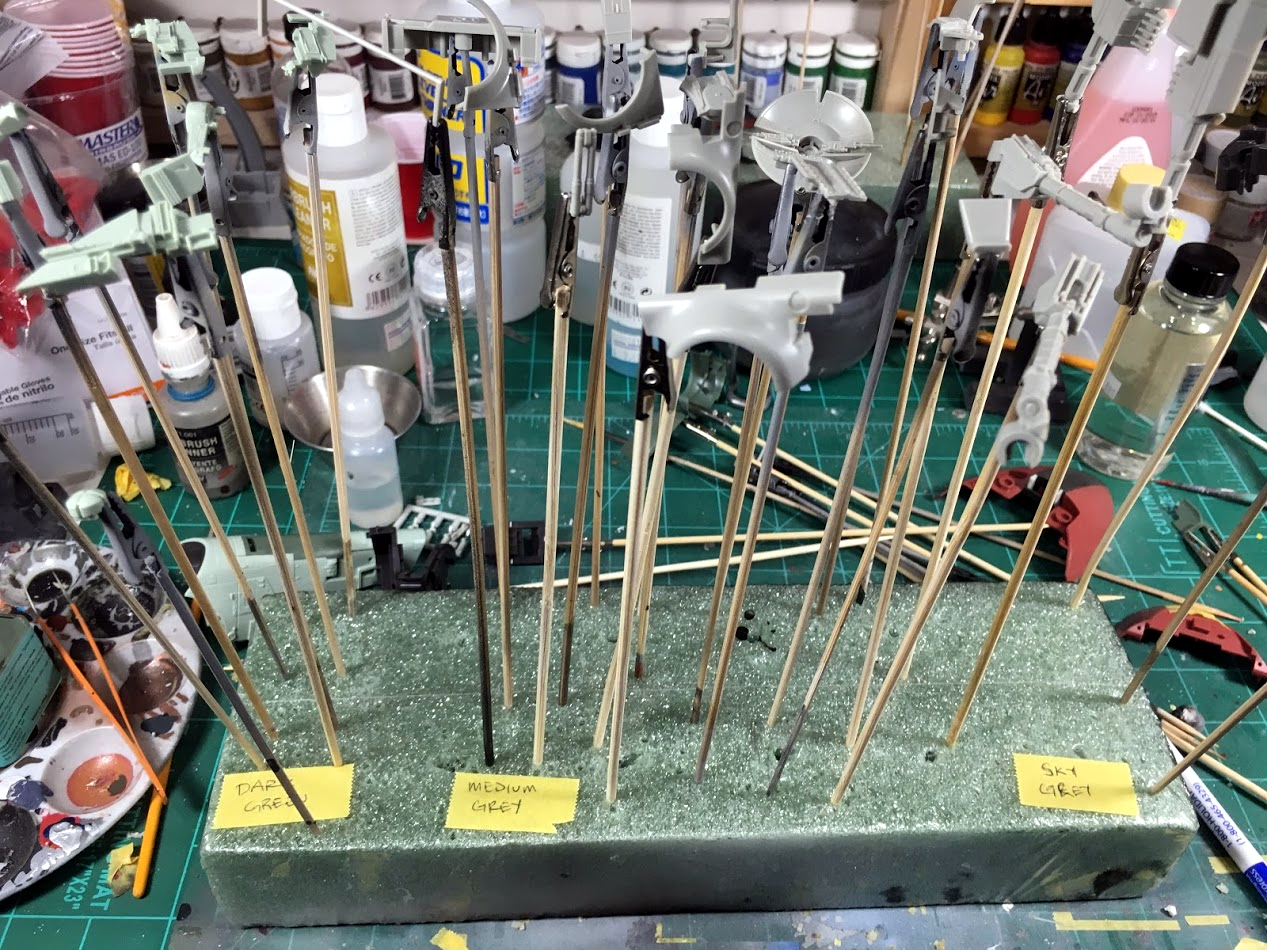
Star Wars kits, this one has to be painted if you want to accurately represent the ship. Having the parts organized by color makes painting it pretty easy given how complex the rear of the ship is. I removed and cleaned all of the parts from the sprue and organized them by what color they were to be painted.
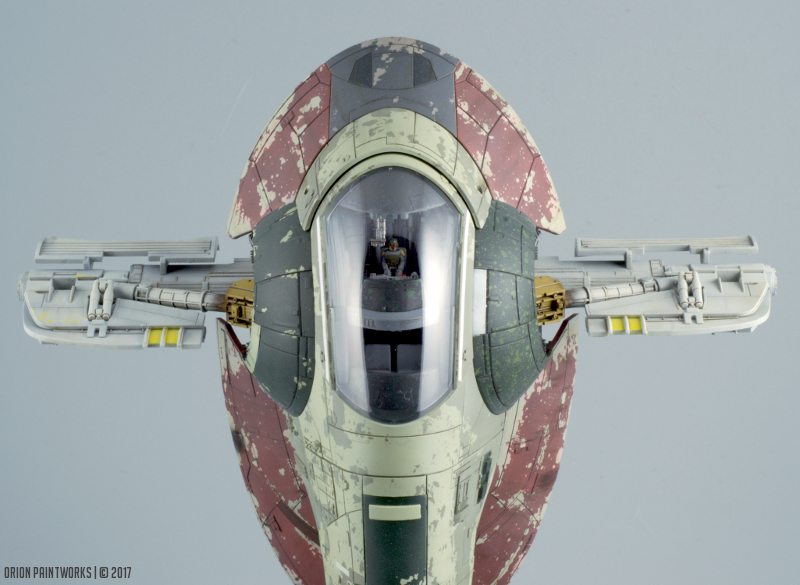
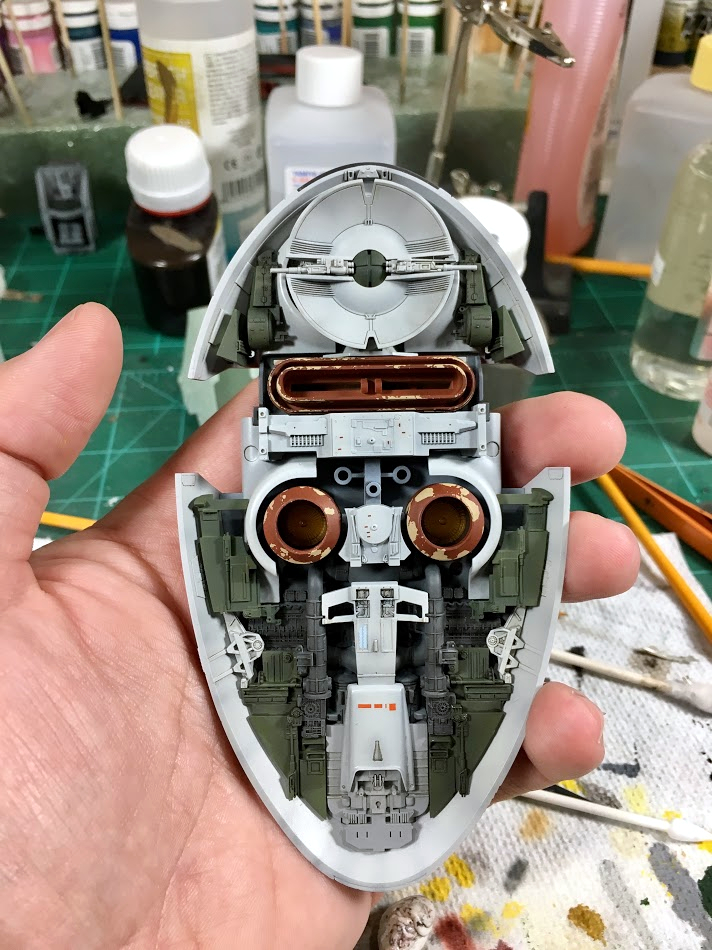
After I got all of the rear pieces organized, I started painting the cockpit. Most sources show that the cockpit should be army green but I much prefer grey, which was Tamiya Neutral Grey (XF-53) in this case. I highlighted a few bits with some Vallejo light grey and silver and gave everything a wash with MIG Dark Wash (enamel). The front console was painted with Tamiya Deep Green (XF-26), I applied some liquid mask with a sponge and then gave it a coat of NATO Black (XF-69).
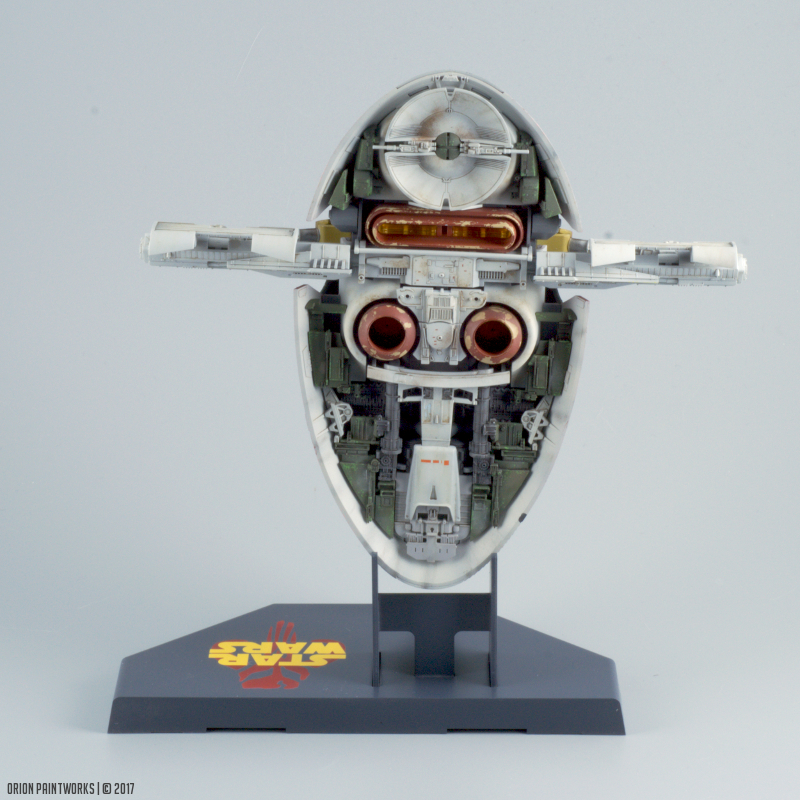
The bottom dark grey layer of the rear was painted with Tamiya German Grey (XF-63) and given a wash with MIG Dark Wash enamel. The engine nozzles were undercoated with Tamiya Buff (XF-57), had some liquid mask applied with a sponge, and then given a coat of coppery brown mixed with a few Vallejo reds and browns. I preshaded the green bits with Tamiya Flat Black (XF-1) and gave them a coat of Tamiya Field Green (XF-65) followed by a wash with MIG Dark Wash enamel as the first pass of weathering. The grey parts were preshaded with Tamiya German Grey (XF-63), painted with Mr Color 315 (Gray FS16440), and given a wash with MIG Neutral Wash enamel. I also applied a few of the small decals on the grey parts.

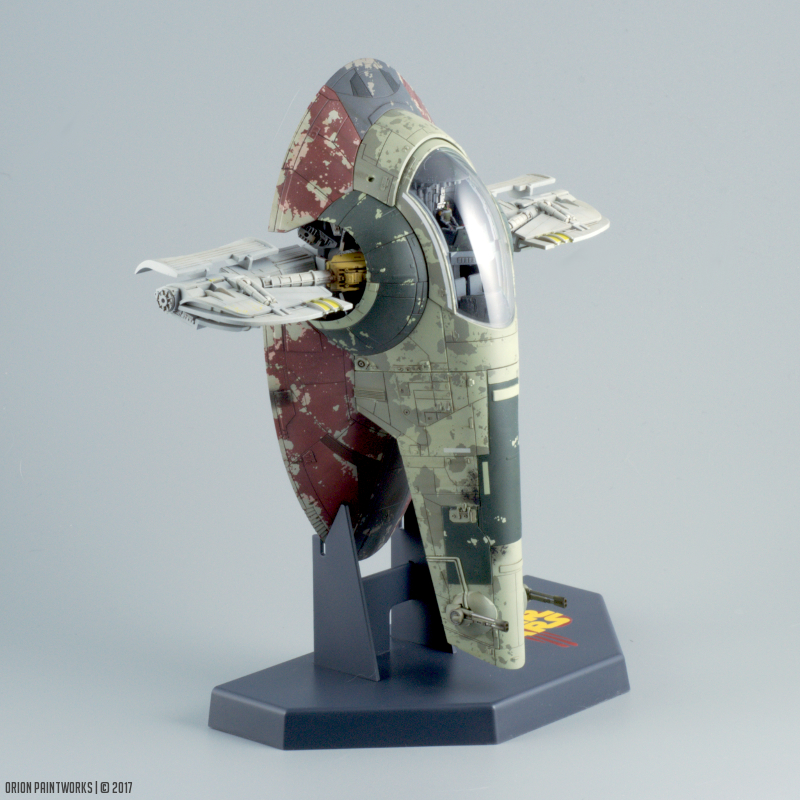
I love how layers of parts are stacked on top of each other to make a complex surface. There is even parts that can't really be seen unless you hold it just so; it really is quite impressive. After all of the pieces are in place, more weathering will be added to dirty everything up, mainly chipping on the raised areas, more enamel washes, and possibly some pigments.
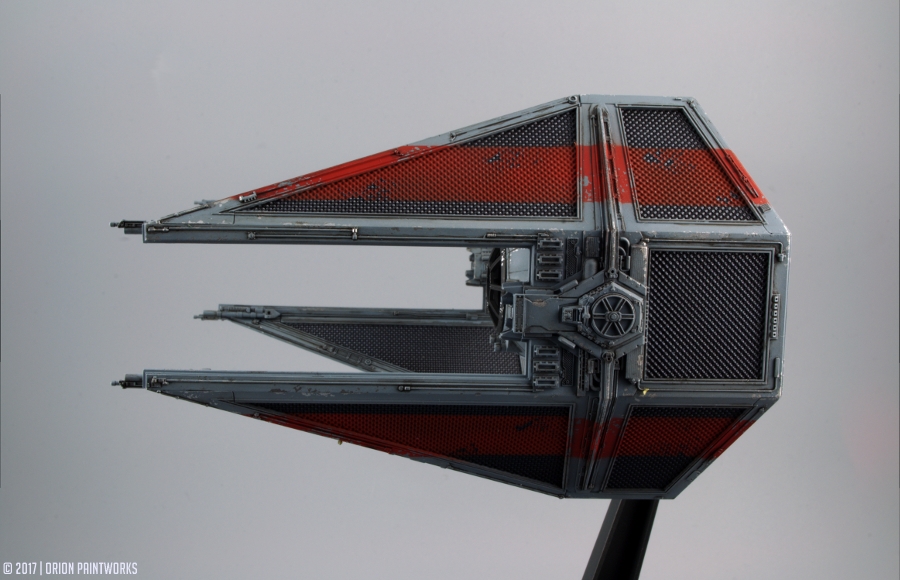
The stabilizers were painted with Mr Color 315 (Gray FS16440), the yellow markings/chips were painted with a mix of Flat Yellow (XF-3) and Yellow Green (XF-4), the red strip was painted with a mix of Flat Red (XF-7) and Hull Red (XF-9), and the entire assembly was given a pin wash with MIG Neutral Wash enamel. After everything dries, they'll get a coat of matte varnish and then more weathering.

With all of the pieces done for the back of the ship, I will move on to the front skirt before finally tackling the main hull.

Wednesday, January 4, 2017

Showcase: Bandai TIE Interceptor (181st Imperial Fighter Wing)

Bandai 1/72 TIE Interceptor (181st Imperial Fighter Wing); completed in Tamiya acrylics, Alclad lacquers, and MIG Productions enamels.