Tuesday, July 29, 2014
WIP: Fine Molds 1/72 TIE fighter, Part 1
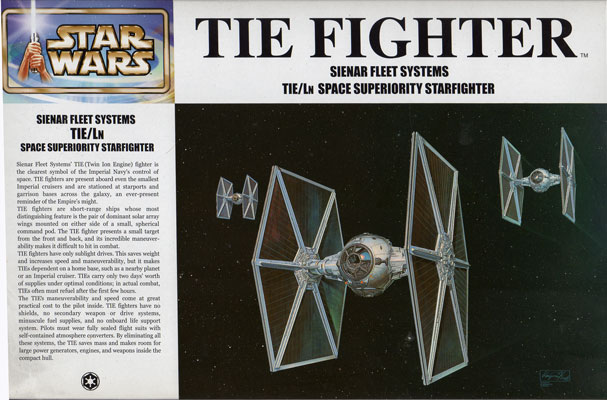
The infamous TIE fighter: the standard space superiority fighter of the Galactic Empire. In the 35+ years of Star Wars films, the craft is nothing short of iconic. As mentioned in a previous post, Fine Molds is no longer producing these phenomenal model kits and I was lucky to be able to get my hands on one at a still reasonable price. With part one of this build log, I'll be taking a look at the kit itself and the first stages of building this great little model after the break.
The first thing one notices about this model is that it is tiny. For the uninitiated, 1:72 scale corresponds 1/6" equaling one foot (so one inch on the model equals six feet in real life) and is a pretty common scale for model aircraft. That fact is also interesting because you are able to see how these imaginary craft measure up to real-world aircraft.
Opening up the box, you'll find seven sprues molded in grey styrene (two sprues for the wing frames, two for the wing panels, two for the stand, and one with the cockpit ball and pilot), one clear styrene (containing the cockpit glass and top hatch), one sheet of decals, and the instructions. It should be noted that the instructions are primarily in Japanese but there are pictograms and English numbers calling out parts and decals so construction is pretty simple. The detail on this kit is outstanding given its small size.
The only aftermarket addition I have is the Graphic Encounters vinyl masks for the cockpit glass. I picked them up from the Starship Modeler store to replace the masks that come with the kit, which are a low tack sticker material and do not come precut. They only set me back $8 and come with enough masks to do four TIE models, which works out well since I have a TIE Interceptor and a TIE Advance/x1 to build and I would like to pick up another standard TIE fighter to go along with this one.
I began the kit by removing the wing frames and interior pieces from their sprues and cleaning everything up. There typically isn't much to clean up on a Fine Molds model as they contain very little flash, almost no mold lines, and the injection pin marks are typically hidden during construction. All those things are what makes working with Fine Molds models just a dream. As seen in the picture above, the wing frames and interiors are separate pieces so there is no need to mask anything when painting the black section of the wings. Small side note: many people refer to the wings of a TIE fighter as "solar panels," which they are not. The TIE fighter's ion engines and laser cannons are powered by a compact, yet extremely powerful, reactor and the wings are used as heat sinks.
The next step was building out the cockpit interior. I started by constructing the pilot's chair and the control yoke tower. I then secured the cockpit floor, rear bulkhead, and walls with painter's tape to a stir stick for painting. I also mounted the pilot to a cork stopper with a paper clip for painting.
The cockpit floor/chair and aft bulkhead were primed with grey Vallejo Surface Primer, preshaded with VMA Black, and then given a coat of Tamiya Neutral Grey (XF-53). The pilot was primed with black Vallejo Surface primer, given a coat of VMA Black, and highlighted from above with VMA German Grey. The cockpit walls and control yoke were primed with black Vallejo Surface Primer and then given a coat of VMA Black. After everything dried, the parts were given two coats of Future Floor Wax and left to dry overnight. The pilot gets a couple of small Imperial cog decals and the angular walls get decals representing the glyph-like red lights that are present inside the cockpit while the floor and aft bulkhead will get an oil wash of 502 Abteilung Oil Starship Filth.
Up next were the interior panels of the wings. After cleaning them up, I gave them a coat of black Vallejo Surface primer and left them to dry overnight. The kit calls for them to be painted with Tamiya Flat Black (XF-1), but while doing research for this build I came across quite a few modelers who tried something a little different. Of the handful of examples I found, the one I found on Badgrendels (he is a moderator over on the Scale Model Addict forum) YouTube page piqued my interest. He said that while watching A New Hope recently, he noticed that the panels have a pearlescent sheen to them, which he recreated with a blue pearlescent paint. After the primer dries, I will attempt to recreate that myself using a mix of VMA Black and VMA Arctic Blue (a metallic paint), mostly likely at a 5:1 ratio. I'm not sure how it will turn out but if I dislike it, it should be easily fixed.
That's all for part one so stay tuned for part two, which will cover interior decals and washes as well as assembly and painting of the cockpit ball.
Subscribe to:
Post Comments (Atom)


No comments:
Post a Comment