Saturday, September 20, 2014

WIP: Space Marine Stormraven, Part 3

When we last left the Stormraven, a freshly laid coat of Tamiya Surface Primer was drying on the model. After it was cured, I used some Tamiya Liquid Surface Primer to fix a couple of spots I was unhappy with and after it was sanded down I reapplied some primer over the areas in question. After that, it was time for some preshading with VMA Black.


Preshading is a technique that makes use of the idea that an airbrush applies thin layers of paint. By darkening areas of the model with your desired color, you can affect the color of the basecoat by allowing some of the preshaded areas to show through the top coat. This can be adjusted depending on how much paint is applied on the topcoat. The result is subtle shading on the model that can bring depth to panel lines and shadows.

I then laid down the base color, again using Tamiya Desert Yellow (XF-59) like the Stormtalons that will be on the tabletop along with this model. Tamiya paints airbrush extremely smooth and leave an extra matte finish; the only downside is that they model is vulnerable to fingerprints, making gloves a necessity.


The client also requested a slight conversion to the model: replace the gun servitor in the turret with a Guardsmen or marine. I agree that it makes little sense that space marines would use a mindless servitor to man the gun on a craft like this. I raided my bits box and after some heavy modification, I managed to cram a space marine into the gun turret.


The engines and other metallic details were painted using a 1:1 mix of VMA Aluminum and VMA Black and along with the rest of the model, are awaiting a coat of Future in preparation of an oil wash and weathering.


Thursday, September 18, 2014

Model Kit Review: Pegasus Hobbies 1/1400 N.S.E.A. Protector

BACKGROUND

Never give up, never surrender!
 Released in 1999, the movie Galaxy Quest follows the adventures of the washed up cast of the eponymous television show almost 20 years after its cancellation. Scraping by making a living at fan conventions and store grand openings, they are whisked in to space by their on screen commander and de facto lead, Jason Nesmith (Tim Allen), after a group of aliens enlist his help when they mistake him for the character he played on the show, Cmdr. Peter Quincy Taggart. The aliens, known as Thermians, while gifted in science and engineering, have no concept of fiction and believe that the cast and the show are historical documents, basing their entire society on the show. When the cast quickly is over their heads, they rely on the help of a small group of superfans with intricate knowledge of the show. The product was a brilliant satire on Star Trek and scifi fandom at large and the movie quickly became a cult classic.

Guided by the television show, the Thermians build a working version of Cmdr. Taggart's ship, the NTE-3120 N.S.E.A Protector, copying it exactly how it appears on screen. An Evolution-class heavy cruiser, the Protector serves as the flagship of the National Space Exploration Administration and is the most powerful starship built by humanity. Though built for the peaceful exploration of space, the Protector is host to a vast array of powerful weapons, inculding resonance cannon batteries, quantum rockets, pulse catapults, and it's primary weapon: a blue particle cannon.
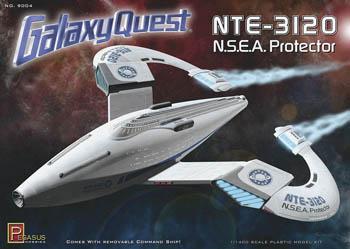
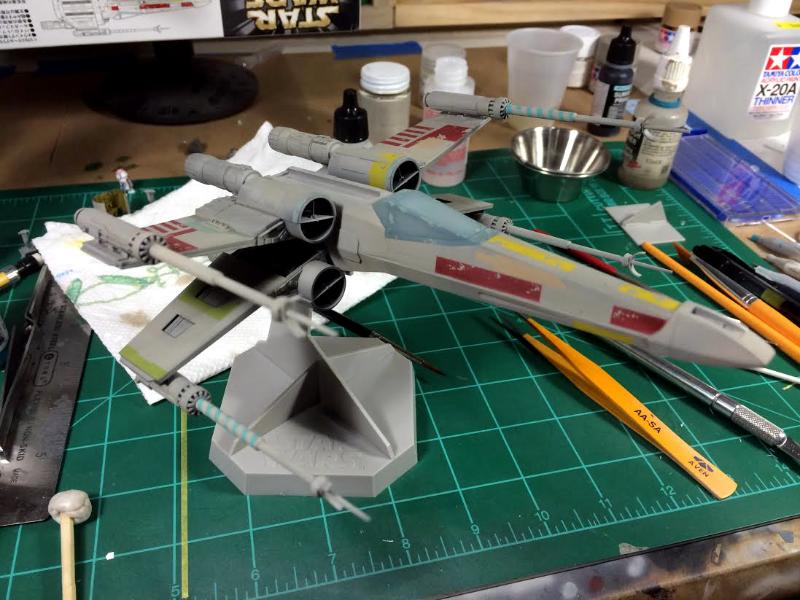
THE KIT


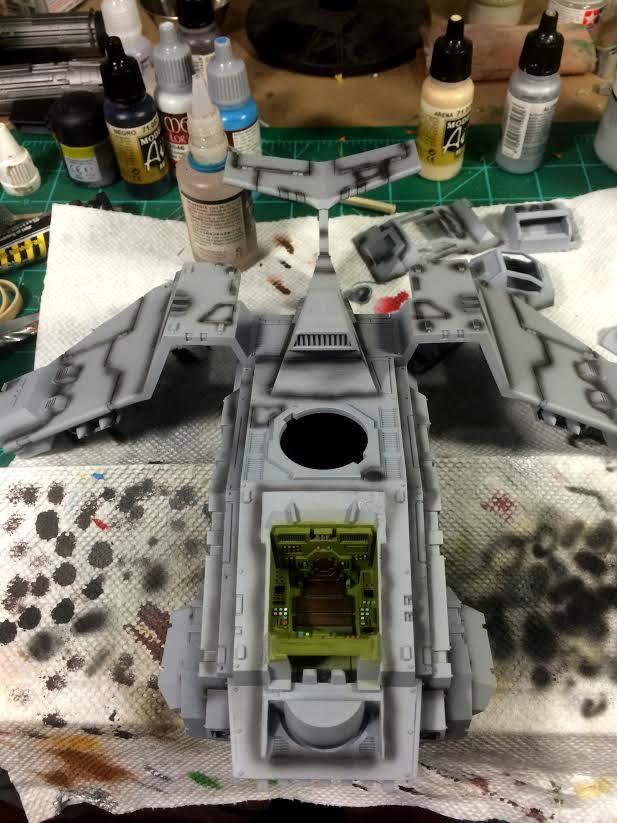
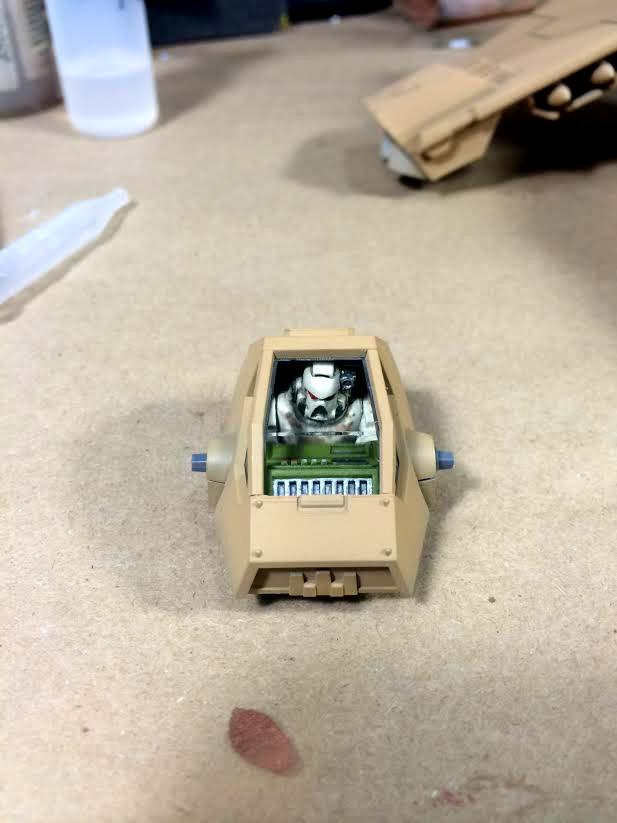
 This 1/1400 scale kit comes with four sprues containing the wings, command deck, and the hull molded in grey styrene. Also supplied is one sprue cast in clear blue that are used in the engines; a nice touch for those who are looking to light the kit. The kit also comes with a Galaxy Quest logo base.

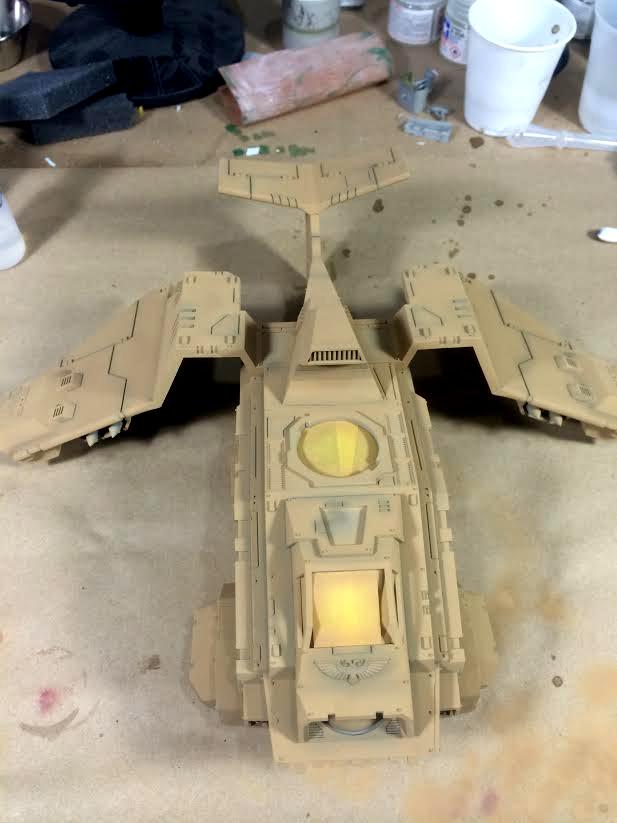
When making this model, Pegasus was given access to the three studio models produced by Industrial Light & Magic; in fact, one model used to hang in the ILM model making studio offices until they closed their doors in 2011. This kit is the same size as the model used in the movie during scenes showing the "classic" TV show, technically making it a studio scale model. However, the details were based off the larger models used in the movie making it a fine looking model. The paint scheme is rather simple, consisting of mostly white and light greys, but a seeing the close ups of the ship in the movie reveals a nice Aztec pattern on the hull. Recreating it should add a little bit of visual interest.

VERDICT

Overall, this kit is definitely a solid buy! This would make an excellent addition to the display cabinet of any science fiction fan. If the adventurous modeler was in the mood to add lights, there is also a photo etch set available from ParaGrafix that has some nice grilles to add to the engines.

Tuesday, September 16, 2014

Model Kit Review: Fine Molds 1/72 Slave I

BACKGROUND

Slave I is easily one of the most iconic ships from the original Star Wars trilogy. The personal starship of the enigmatic bounty hunter Boba Fett, it first appeared in The Empire Strikes Back where Fett used it to track Han Solo to Cloud City on the planet Bespin.

The ship began its life as a Kuat Systems Engineering Firespray-31 patrol and attack craft before being stolen by the bounty hunter Jango Fett. After his death during the Battle of Geonosis, the craft was passed to his son, Boba, who would use it to great effect during his career as one of the most notorious bounty hunters in the galaxy. While in possession of the Fett's, the craft was given numerous upgrades to its engines, avionics, and weapon systems. The upgrades to its engines gave it sublight speeds rivaling that of the BTL Y-wing starfighter, an impressive feat for a ship this large, while the upgrades to the sensors and jamming array made the ship invisible to other starship sensors, allowing Fett to easily slip into the most secured areas. Most importantly, the weapon system was expanded to allow the ship to equip proton torpedoes, concussion missiles, Void-7 seismic charges, and an ion cannon in addition to the standard heavy blaster cannons: an impressive amount of firepower contained in one ship.

THE KIT


This kit was the seventh entry into Fine Molds outstanding line of Star Wars model kits and their second large ship model kit, after their impressive Millennium Falcon kit. Like the majority of other kits in this range, Slave I is finely molded in a light grey styrene and nearly devoid of flash or mold lines. Injector pin marks are only on areas that will not be visible when the model is complete, meaning almost no filling and sanding is needed. The only major seam on this kit runs down the middle of the hull where the two halves are joined; filler is a must to eliminate the seam. Luckily, there are few panel lines in this area so sanding them down shouldn't prove much of a problem, especially if you are careful. This is a large kit: there are ten sprues, including the one that contains a stand for the model to be displayed in its upright flying position. Also included are two Boba Fett miniatures: a seated one for the cockpit and a standing one to attach to the base. There is also one small decal sheet that contains the small yellow, white, and burgundy markings found on the ship. The kit is also supplied with extensive color-printed painting guide, a nice touch considering most of the time spent completing this model will be used replicating the complicated color scheme. Since this was a first production kit, it also came with a limited edition Han Solo frozen in carbonite cast in white metal. This addition will no doubt look great positioned next to Boba on the display base!

VERDICT

I think it goes without saying that Fine Molds hit this one out of the park. Between the superb engineering and the intricate details, this kit is outstanding. It is a kit truly worthy of the most feared bounty hunter in the Galaxy!

Sunday, September 14, 2014

WIP: Space Marine Stormraven, Part 2

After the oil paint had dried, I sealed everything in with matte varnish to protect it from the next layer of work to go in. I painted the steel grating with a 1:1 mix of Vallejo Model Air Steel and VMA Black, which as slowly become my go-to color for steel. I then painted all of the various details like the seats and the computer panels. I would normally do a gem effect for the screens like I did with my Land Raider, but given the fact that the interior was already assembled and getting my airbrush to the right angle would prove tricky, I just left them black. I then did two layers of sponge weathering, first using VMA Camo Black Brown and the second layer with VMA Black. I used various earth tone pigments to simulate dirt and followed everything up with some Tamiya Gun Metal pigment for the most worn corners and Tamiya Steel pigment for the metal grating.


I assembled the two hull pieces and glued them together with Tamiya Extra Thin cement and allowed it to dry using rubber bands to hold everything together. I then gave the entire model a coat of grey Tamiya Surface Primer from a rattle can. This primer is fast drying and gives a wonderful surface to work on. I chose the rattle can as opposed to my airbrush because of the large surface area of the model and because it takes to sanding much better than Vallejo Surface Primer. This is important because there are already a couple of areas that will require more filler and sanding.


Saturday, September 13, 2014

WIP: Space Marine Stormraven, Part 1

 I received the next round of models from my client this week, a space marine Stormraven gunship and an Imperial Knight-Titan. These were bought second hand, which in my experience usually means poorly assembled and often with missing pieces. Unfortunately, these modes lived up to my low expectations.

The Stormraven is in two major pieces plus the engines. The bottom hull is one piece and the top hull/wings is the other. Of course, the cockpit was incomplete and glued shut. Luckily I was able to remove it with little to no damage to the pieces. I spent over an hour sanding all of the glue off the model. It appears it was put together with something like Tamiya Extra Thin Cement, which is a great glue. The person that put it together "painted" the surface of every joint with the stuff, which is not needed with this glue. To use it correctly, you just have to touch the joint with the brush and capillary action sucks the glue into the joint and you press and hold of a minute and it's done.

I started with the Stormraven, which as previously mention, was mostly assembled. Of course this makes painting the interior somewhat difficult. Luckily, the inside of the model is pretty large so I was able to get a nice coat of grey Vallejo Surface Primer down to begin painting. This is an instance where priming with an airbrush really pays off; there is no way I could have primed the interior with a spray can. After I allowed to the primer to cure for 24 hours, I gave the entire interior a couple of coats of my chosen interior green color: a 1:1 mix of Vallejo Model Air Pale Green and Vallejo Model Air US Grey Light. I chose this color based on the interior of modern APCs and IFVs, which are a light greenish color. I gave everything a coat of Future and after that dried, a wash of 502 Abteilung Starship Filth and then cleaned up the excess with a makeup applicator and odorless turpenoid. This was the result:


After the oil dries overnight, I will seal it in with matte varnish and begin painting the details by hand. I will also spray the the metal grating with VMA Gunmetal just for a little variation. After the details are painted, I will give the interior a little bit of sponge weathering and some pigments before it gets closed up.

Model Kit Review: Fine Molds 1/48 Snowspeeder (Modified Incom T-47Airspeeder)

BACKGROUND

The Incom T-47 airspeeder was an atmospheric craft originally designed for industrial cargo handling. The craft came in to prominence during the Galactic Civil War when it was heavily modified for cold weather by the Rebel Alliance for use on the ice planet Hoth. Although the T-47 had been armed with Ap/11 laser cannons, Rogue Squadron found these proved ineffective against the heavily armored Imperial AT-AT walkers while defending Echo Base during the Battle of Hoth. Luke Skywalker, flying as Rogue Leader, instructed his squadron to use the harpoon and tow-cables on the T-47 to target the vulnerable legs of the Imperial walkers. This proved effective in disabling the massive AT-ATs and giving the Rebel fleet time to evacuate the installation.

THE KIT

This wonderful Fine Molds kit is one of their three 1/48 scale releases and the only one not represented in another scale. It's a good thing too, because even at 1/48 scale, this model is tiny: the hull measures less than 4" long. However, like all Fine Molds kits, the diminutive size of this model doesn't mean there is a loss of detail. All of the panel lines and greebles are crisply reproduced by Fine Molds with their usual attention to detail.

The kit comes with five sprues: four molded in grey styrene and one clear sprue. The canopy is a two part construction with the clear pieces housed underneath the canopy frame. This gives the modeler the option of leaving the clear pieces out of the canopy to accurately represent the filming model. Two Rebel pilots are also included for the finely detailed cockpit. Another neat feature is the option to model the air brakes in an open position to give the effect of the craft in flight. It's a nice touch that can lend itself well to using the model in a dynamic display or diorama. The kit is also supplied with a decal sheet featuring both the orange and grey markings seen in The Empire Strikes Back. Just as in the other Rebel Alliance model kits, these decals reproduce the chipped paint that the filming miniatures had. Like all Fine Molds Star Wars kits, this model is also supplied with a display base.

 VERDICT

This is another wonderful kit by Fine Molds! The model well molded, easy to assemble, and accurate all the way down to the placement of the paint scratches on the decals. It is a shame that they no longer carry the Star Wars license, I would have loved to see them tackle some of the underrepresented subjects in the Star Wars Universe (I'm looking at you, B-wing...). This kit should prove to be another fun build and I look forward to getting started on it.

For those interested, I purchased this kit from Dragon USA Online. They are one of the only places that currently sells this kit anywhere near the original retail price. Most other online retailers are selling it for $60+ or no longer offer it. If you are looking to add it to your model collection, now would be a good time before it is no longer available.

Wednesday, September 10, 2014

Model Kit Review: Skyhook Models Planet Express Ship

Let me begin by saying this... I am a huge Futurama fan and have been since the series first aired in 1999. I think it was a mix of a few things that led to my love of this show: it has the classic Matt Groening style, I absolutely love science fiction, and the show debuted in the waning years of my Simpsons addiction. All of this made a winning combination.

A couple of years ago, when I first started modeling Warhammer figures, I found out that there was a model of the Planet Express Ship available... or at least it was. It had recently gone out of production so there was little chance that I would be able to get a hold of one. Then I found out it was coming back in to production: now would be my chance! So of course, I didn't buy one. Well, that all changed last week when I finally decided it was time to bring one home!

This kit is made by Skyhook Models, a garage resin company that specializes in underrepresented science fiction topics. The model is ten pieces (including the huge base), cast in a hard white resin and is free of any major casting flaws; nothing outside of standard resin cleanup will be needed on the parts. You also get a frosted acrylic bead for the gun turret, a small section of 0.31mm wire for the cannon, and two ALPS printed decals for the tail fin.

The real question is: how accurate is the kit? Well, it isn't that accurate compared to the "real" one. The fuselage is much too narrow in the middle and the nose is too pointy. However, these are all things I knew when I bought the model. Being pretty much the only model of this awesome spaceship available (outside of a near $400 model made by a prop builder from Atlanta), I am more than willing to accept the flaws in this kit. The only real issues with the kit is that the molding that runs around the fuselage doesn't wrap around the rear of the ship like it is supposed to. That isn't too much of a problem as the the engine mount takes up most of the space in the rear. However, I will probably have to sculpt some more molding out of Milliput to complete it. My other issue is the door on the starboard side; it is severely lacking detail. I will probably scratch built one out of plasticard to replace it and add the ladder on the hull with some brass rod. I will probably end up scratch building the the gun for the turret as well.

All and all, this is a fantastic kit of an awesome subject. Despite the flaws with the kit, it is well worth it's $59 (shipping included!) price tag.


Monday, September 8, 2014

Showcase: Incom T-65B X-wing starfighter

Except of the base, which I haven't decided on yet, it's all done:


Fine Molds 1/72 scale model; completed in Tamiya and Vallejo acrylics, 502 Abteilung oils, and Secret Weapon Miniatures pigments.

Sunday, September 7, 2014

WIP: Fine Molds 1/72 X-wing, Part 4

I finished the tiny decals on the X-wing. In short, they were a total pain and I don't like how they went down. Fine Molds decals are very thick and getting them to lay down smoothly is a pain. I plan on giving them a few more coats of MicroSol and I might even give the model a dusting of the base color to brighten the model a little.

I also added a panel decal that I forgot to paint. That decal went down pretty good but I'm unsatisfied with the color; a few filters and coats of oil paint might fix it though.

On an unrelated note, I caved and bought this little guy:
It is a resin model made by Skyhook Models, a garage shop that specializes in sci-fi models. It's only a handful of pieces and about 11" long when complete. The proportions are a little off compared to the Planet Express Ship in the cartoon, but for $60 shipped I'm willing to live with it.

I also tinkered with the blog layout a little bit and went with something a little more "classy," if there is such a thing.

Thursday, September 4, 2014

Updates: Commissions, Personal Projects, & Northern Virginia IPMS

I attended the monthly meeting of the Northern Virginia IPMS club on Wednesday night for the first time. This was a big step for me for a couple of reasons: first, I'm a somewhat shy introvert (those two things are different!) that is uncomfortable in social situations with strangers, and two, it is only the second time I had publicly displayed my work (the first time was at the Huzzah Hobbies Painting Competition in 2012). Needless to say, everyone I talked to was very friendly and made me feel welcome! Another plus was there was five new members besides myself in attendance last night so I wasn't the only new guy. The club holds a friendly model contest every month and I brought a small selection of models to display: the TIE/Ln fighter, Darth Vader's TIE/x1 Advanced, my Deathwing Venerable Dreadnough, and a Grey Knights terminator. This was the result:

That's right, my TIE fighters one First Place in the Sci-Fi category and my space marine models won Best of Show! I was beyond excited to recieve the Best of Show reward, especially considering there was some stiff competition that night! Unfortunately, I will not be able to attend next month's meeting because of work, but I am looking forward to bringing even more models the following month.

As far as personal projects go, I'm still forging ahead on Luke's Red Five X-wing. The colored panels are complete without the use of decals. I also put two layers of Mig Productions Brown Filter to warm the model up some and give a nice foundation to begin weathering. However, I will have to coat the model in Future to put on the decals for all the little details on the model; there are numerous black squares and other stuff like that around the model that are just too small to paint. Here is how it looks presently:

On the commission front, I am awaiting an Imperial Knight-Titan and Stormraven to arrive in the mail this week. They will be painted in the same manner as the two Stormtalons I completed last month. I have also been contacted by a repeat customer to paint his soon-to-be-arriving Infinity PanOceanian force. This should be interesting as I have never painted Infinity miniature before but I know they are pretty small and packed with details. Another client contacted me earlier this week to let me know that he ordered the kit for his submarine model, the USS Michigan (SSBN-727). The kit is coming from Asia and he isn't sure when it will arrive, but when it does I am looking forward to starting on it.