Now
that I finally have some extra time, I'm sitting down to knock out the
Dragon Models USS Maryland (SSBN-738) that will be built as the USS
Michigan (SSBN-727). The kit doesn't go together all that well; I've had
some issues where the missile deck meets the hull and I ended up having
to do some minor surgery just to get it set properly. I'll end up
needing to add some filler too. I also wound up
gluing the diving planes to the sail and filling the seams because
there was a nasty gap where they attached. I'm doing the same with the
stern planes as well. This will make them immobile, but it will look
much better.
As far as painting the model, submarines aren't
known for their complex color schemes, which should make it a rather
easy paint job. I had planned on doing the black with Tamiya Flat Black
(XF-1) and giving it a slight highlight with German Grey. I was also
planning on doing the anti-slip walkways with Tamiya NATO Black (XF-69),
maybe with a little Neutral Grey mixed in to lighten it.
Sunday, December 21, 2014
Wednesday, December 17, 2014
Showcase: Nurgle Chaos Lord
This is one of my all time favorite sculpts
from Games Workshop. I bought this miniature almost two years ago,
painted it soon after I brought it home, and it has sat on my shelf
without a base since then. I decided to use
the sculpted base that came with it because I don't have any square
bases. The skin is a complex mix of at least eight colors; even though I
wrote them all down in chronological order, I probably couldn't
recreate it if I tried. Looking at the finished product, there are some
things I could probably touch up but I will most likely leave it as is. I am thoroughly enjoying my commission break, getting the time to finish off these models I have in my backlog has been a real treat.
Tuesday, December 16, 2014
Showcase: Raptors Master of Relics
Since I have some downtime with commissions because of the holidays, I
decided to go through my backlog and find nearly complete models and
finish them off. Having recently completed my Cadre Fireblade,
I moved on to some of my space marines that were collecting dust. I
purchased this Master of Relics the week it was released to compliment
my small army of Raptors and because it was my favorite if the space
marine masters released with the Apocalypse rule book. I feel that this
model fits the Raptors aesthetics pretty well and will look great with
the rest of my Raptors in my display cabinet.
Sunday, December 14, 2014
Showcase: Tau Cadre Fireblade
I painted this miniature just for fun shortly after it was released (so
awhile ago!) and it sat on the shelf unbased until recently. I didn't
use that special base that was supplied with the model, instead opting
to use a piece of cork painted in a desert theme. Admittedly, the base
is the weakest part of the entire miniature. I hurried to get it based
before the November meeting of my local IPMS club meeting, as I intended
to enter it in the model contest. Unfortunately, it didn't win anything
(I did take home a first place in the figures category with a
Devastator Centurion and a second place in science fiction category with
a Fine Molds X-wing). I don't play Tau so I have no use for this model
other than to like nice in my display cabinet.
WIP: Trollbloods Mauler
I have a lull in commissions at the moment, which is actually quite nice
as it is the holidays and I can get some personal stuff going. I have
two requests for rather large commission that need to respond to, but
until then I'd really like to get some more Star Wars models completed. I have a massive stack of various Star Wars
models that need to be completed and I still hope to, but in the mean
time I found this Trollbloods Mauler I had sitting on my shelf and
decided it could use a nice coat of paint:
I used a variety of blues (VGC Turquoise, VGC Electric Blue, P3 Underbelly Blue, with VMA White) for the skin and added some shadows with Secret Weapon Minutes Black Red wash and ground up red and purple artist pastels. I still need to give the model a coat of Future and an oil wash before I move on to the details.
I used a variety of blues (VGC Turquoise, VGC Electric Blue, P3 Underbelly Blue, with VMA White) for the skin and added some shadows with Secret Weapon Minutes Black Red wash and ground up red and purple artist pastels. I still need to give the model a coat of Future and an oil wash before I move on to the details.
Sunday, December 7, 2014
Showcase: Imperial Knight-Titan
Here is an Imperial Knight-Titan I recently completed for a client that is an active duty Marine. It was painted to match a pair of Stormtalons and a Stormraven
I completed for the same client. It is painted to match modern military
armor with no insignias, embellishments, or other markings and based as
requested by the client. He requested subtle battle damage (much like
the previous models) so an oil wash and some sponge chipping were used
to add a little weathering. I would have liked to do more, but time and
the client's vision for the model prohibited that. This model was sent
to me partially completed and partially painted, requiring me to strip
off as much paint as I could. I'm not sure what it was painted with, but
it gave me fits and ended up leaving a rough texture on a few armor
pieces. Surprisingly, after repriming and painting it, the rough texture
look good on the final product as it more closely resembled what real
armor looks like. Also, half of the pieces were missing so the client
asked me to track down what I could; I managed to get most of what was
needed but I was unable to procure the piece that allows the head to
swivel so it was glued in place. There were no instructions supplied
either, so luckily my fellow Dakka-ite darefsky was able to hook me with a copy of them, so massive thanks to you!
Saturday, December 6, 2014
Showcase: Space Marine Stormraven
This is a space marine Stormraven that I completed for an active duty US Marine. It goes along with a pair of Stormtalons I completed over the summer for the same client and also an Imperial Knight-Titan that I need to photograph. This model was pretty straight forward, the only real issue was the fact that it was partially assembled when I received it so considerable rework had to be done.
Thursday, December 4, 2014
First Impressions: Bandai 1/72 X-wing
Along with the 1/12 Darth Vader I wrote about previously, Bandai has also released 1/72 scale offerings of the X-wing and TIE/x1 Advanced. Having built both the Fine Molds versions of these models, I was eager to get one built to compare it to the Fine Molds model.
Overall, it's a very nice kit with a couple of cool features and a few "interesting" design choices. The thing I really like is the droid socket behind the cockpit. Unlike the Fine Molds version, a fully assembled astromech droid slides into the socket, instead of just the dome. You remove the butt plate and slide the power generator trench back and out comes the droid. It also comes with two droid bodies so you can build both an R2 and R5 series droid. The detail is really crisp and quite impressive. Also, the S-foils lock together better than the Fine Molds version making it easier to display the craft in a landed position.
As mentioned by other people around the Web, the addition of the red panels is kind of pointless and adds unneeded complexity. The fuselage goes together sort of like a Lego kit with various small pieces plugged into various openings. The finished product looks fine, but I prefer Fine Molds method of keeping the fuselage in two main pieces to eliminate most seam lines. That being said, there are some gaps where a few of the pieces meet and I've had issues with the laser cannons staying on the wingtips, but this will be solved by gluing the kit (which I intend to do).
Lastly, I took a handful of comparison shots of the two X-wings next to each other:
Monday, December 1, 2014
Showcase: Bandai 1/12 Darth Vader
The cape is still my biggest complaint with the kit. There is a small clip that the cape connects to on each shoulder, however, the cape does not want to cooperate with the clip on the left should. I will be the first to admit that it doesn't look that bad on the finished model. I have a few commissions that I am sending away this week and after that I'm going to start getting some paint on this kit.
Sunday, November 30, 2014
Model Kit Review: Bandai 1/12 Darth Vader
BACKGROUND
There is no denying that Darth Vader is one of cinema's most iconic villains: cloaked in black, face hidden behind a sinister mask, and armed with an powerful knowledge of the Force and piloting skill matched by no one, this Dark Lord of the Sith will stop at nothing to bring the enemies of the Empire to justice.His unforgettable appearance was designed by the legendary conceptual artist Ralph MacQuairre, though the mask was originally designed to only be used as a spacesuit and was not part of the normal costume for the character. Luckily, it was decided to make his mask/suit part of the character and his terrible visage was forever cemented in to cinema history!
THE KIT
This is one of three new offerings from the Japanese company Bandai after they assumed the Star Wars license from Fine Molds following the sale of Lucasfilm to The Walt Disney Company in 2012 to the tune of over $4 billion. Bandai is best know for making Gundam model kits and is well known within the modeling community for producing kits the "Bandai Way": intricate (sometimes over) engineering, multicolor molding, and snap together assembly. The question is, how does that translate to the world of Star Wars?The kit comes on six sprues molded mainly in black (for obvious reasons!), with the pieces having either a high gloss or satin finish, depending on where the piece goes on the finished model. There is also a clear red piece for the lightsaber blade and a dark gunmetal piece for his shoulder armor. The kit is also supplied with a base resembling the floor of the Death Star and both waterslide decals and stickers to use on the kit. The detail on the pieces is fantastic with fine casting on the padded parts of his armor and sharp detail on the mask and chest. The cape may be the only weak part of the kit as it is solid plastic, making it unable to flow like a real cape. However, it is molded in several pieces so hopefully that will make up for an apparent lack of movement. This kit can be built with absolutely no painting, but should the modeler choose to add paint, Bandai has give a short color call out on in the building instructions.
THE VERDICT
Even without having built this kit, it definitely appears to be a solid addition to any Star Wars modeler's collection. This kit would look great built straight out of the box, but an experienced modeler could have a field day making the small improvements needed to this kit to make it truly worth of the Dark Lord of the Sith!Thursday, November 27, 2014
Showcase: Vampire Counts Mortis Engines
The client was very happy with the way they turned out. In the end,
there are some things I would have improved upon, mainly the metallics
on the ghost swarm weapons. It should be noted, however, that I went
back and added a black wash followed by a light rusty wash on the
weapons/armor after I took these pictures. Even after I did that,
I still would have like to improve it some more. Unfortunately, going
above and beyond must sometimes be sacrificed to meet a deadline (which
kills me because I'm a perfectionist). I took these pictures of the
morning I handed them over to their owner and I didn't have a chance to
take new ones (it's also why the first picture is slightly out of
focus).
Friday, October 3, 2014
seaQuest DSV
This model showed up at my house today. For those of you who don't remember, seaQuest DSV was a short lived, yet stellar, science fiction series that first aired on NBC in 1993. It only lasted three seasons before NBC canceled it, but the first season is superb and is a major part of why I grew up loving science fiction.
I found this model on eBay shortly after learning that it existed; I had stumbled upon while search the internet for out of production models. I managed to find a person on eBay selling this model for less than half what others were selling it for so I snatched it up.
I will be entering it in the Scale Model Addict Winter Group Build (Modeling the Movies & TV).
Saturday, September 20, 2014
WIP: Space Marine Stormraven, Part 3
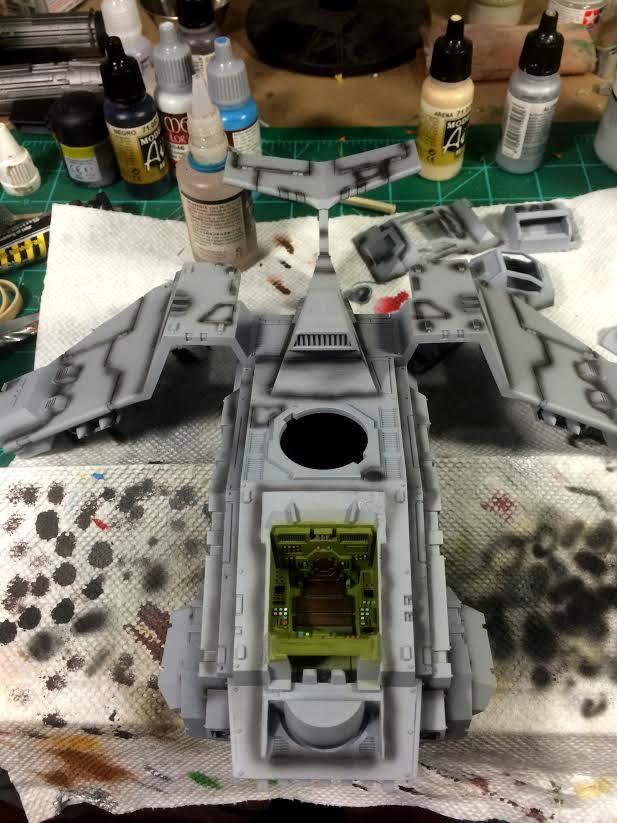
When we last left the Stormraven, a freshly laid coat of Tamiya Surface Primer was drying on the model. After it was cured, I used some Tamiya Liquid Surface Primer to fix a couple of spots I was unhappy with and after it was sanded down I reapplied some primer over the areas in question. After that, it was time for some preshading with VMA Black.
Preshading is a technique that makes use of the idea that an airbrush applies thin layers of paint. By darkening areas of the model with your desired color, you can affect the color of the basecoat by allowing some of the preshaded areas to show through the top coat. This can be adjusted depending on how much paint is applied on the topcoat. The result is subtle shading on the model that can bring depth to panel lines and shadows.
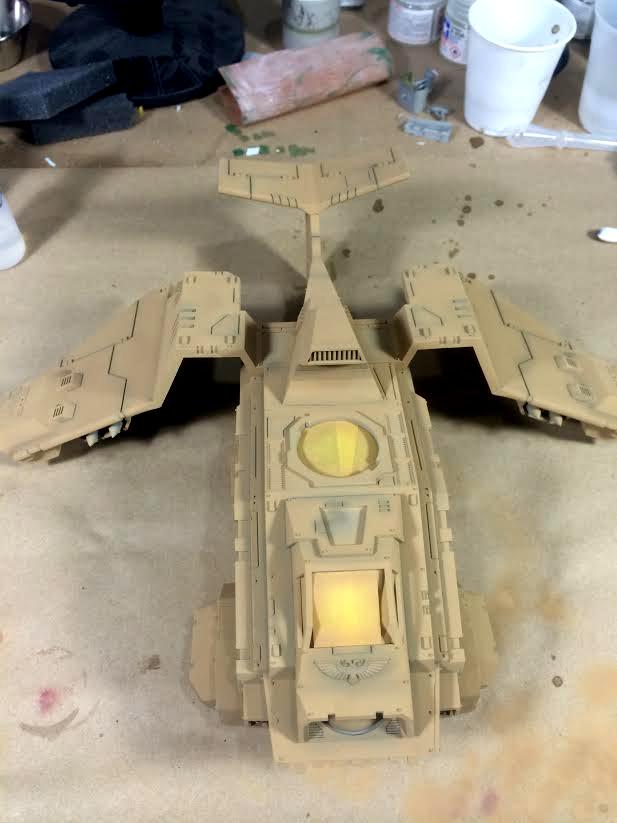
I then laid down the base color, again using Tamiya Desert Yellow (XF-59) like the Stormtalons that will be on the tabletop along with this model. Tamiya paints airbrush extremely smooth and leave an extra matte finish; the only downside is that they model is vulnerable to fingerprints, making gloves a necessity.
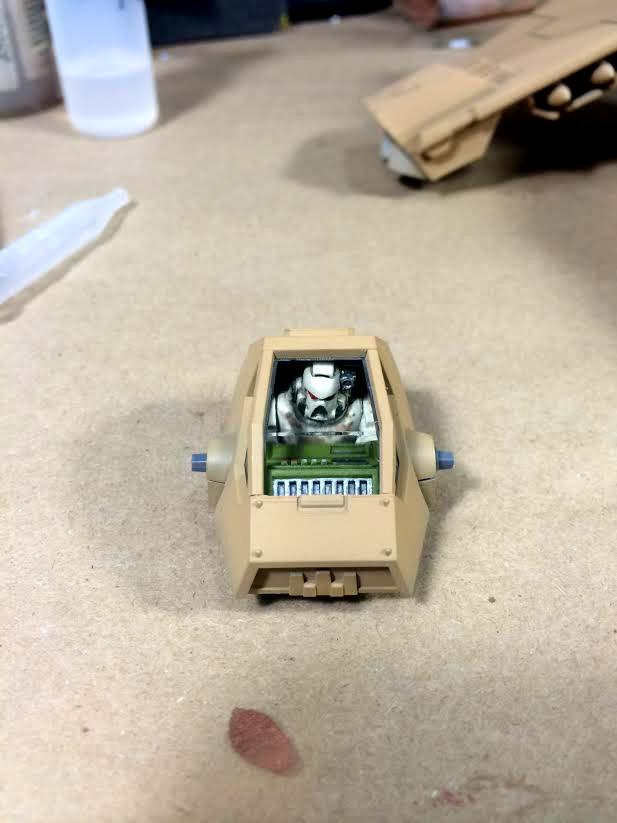
The client also requested a slight conversion to the model: replace the gun servitor in the turret with a Guardsmen or marine. I agree that it makes little sense that space marines would use a mindless servitor to man the gun on a craft like this. I raided my bits box and after some heavy modification, I managed to cram a space marine into the gun turret.
The engines and other metallic details were painted using a 1:1 mix of VMA Aluminum and VMA Black and along with the rest of the model, are awaiting a coat of Future in preparation of an oil wash and weathering.
Thursday, September 18, 2014
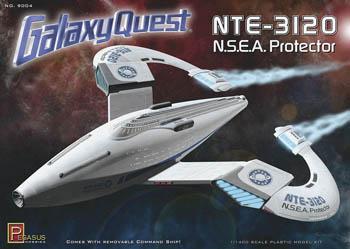
Model Kit Review: Pegasus Hobbies 1/1400 N.S.E.A. Protector
BACKGROUND
| Never give up, never surrender! |
Guided by the television show, the Thermians build a working version of Cmdr. Taggart's ship, the NTE-3120 N.S.E.A Protector, copying it exactly how it appears on screen. An Evolution-class heavy cruiser, the Protector serves as the flagship of the National Space Exploration Administration and is the most powerful starship built by humanity. Though built for the peaceful exploration of space, the Protector is host to a vast array of powerful weapons, inculding resonance cannon batteries, quantum rockets, pulse catapults, and it's primary weapon: a blue particle cannon.
THE KIT
This 1/1400 scale kit comes with four sprues containing the wings, command deck, and the hull molded in grey styrene. Also supplied is one sprue cast in clear blue that are used in the engines; a nice touch for those who are looking to light the kit. The kit also comes with a Galaxy Quest logo base.
When making this model, Pegasus was given access to the three studio models produced by Industrial Light & Magic; in fact, one model used to hang in the ILM model making studio offices until they closed their doors in 2011. This kit is the same size as the model used in the movie during scenes showing the "classic" TV show, technically making it a studio scale model. However, the details were based off the larger models used in the movie making it a fine looking model. The paint scheme is rather simple, consisting of mostly white and light greys, but a seeing the close ups of the ship in the movie reveals a nice Aztec pattern on the hull. Recreating it should add a little bit of visual interest.
VERDICT
Overall, this kit is definitely a solid buy! This would make an excellent addition to the display cabinet of any science fiction fan. If the adventurous modeler was in the mood to add lights, there is also a photo etch set available from ParaGrafix that has some nice grilles to add to the engines.
Subscribe to:
Posts (Atom)


