I received the next round of models from my client this week, a space marine Stormraven gunship and an Imperial Knight-Titan. These were bought second hand, which in my experience usually means poorly assembled and often with missing pieces. Unfortunately, these modes lived up to my low expectations.
The Stormraven is in two major pieces plus the engines. The bottom hull
is one piece and the top hull/wings is the other. Of course, the cockpit
was incomplete and glued shut. Luckily I was able to remove it with
little to no damage to the pieces. I spent over an hour sanding all of
the glue off the model. It appears it was put together with something
like Tamiya Extra Thin Cement, which is a great glue. The person that
put it together "painted" the surface of every joint with the stuff,
which is not needed with this glue. To use it correctly, you just have
to touch the joint with the brush and capillary action sucks the glue
into the joint and you press and hold of a minute and it's done.
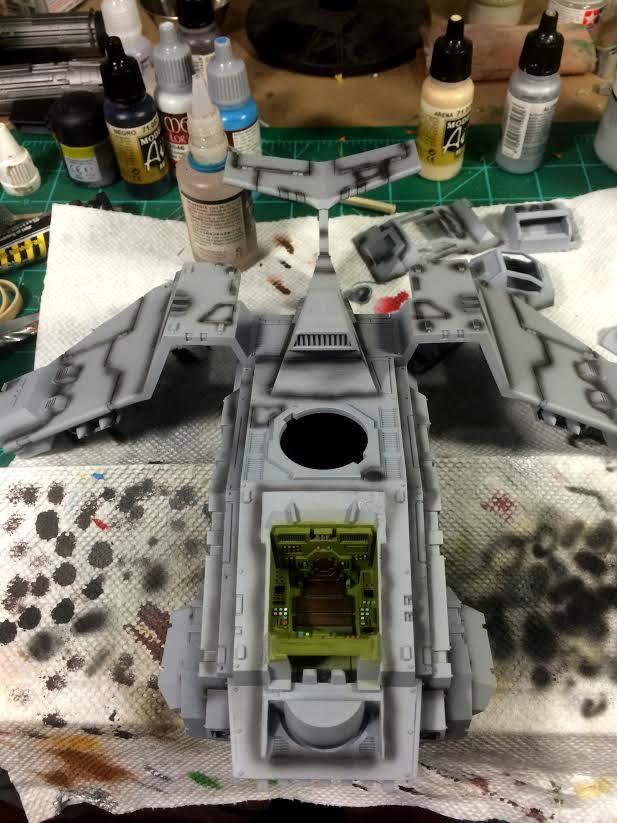
I started with the Stormraven, which as previously mention, was mostly assembled. Of course this makes painting the
interior somewhat difficult. Luckily, the inside of the model is pretty
large so I was able to get a nice coat of grey Vallejo Surface Primer
down to begin painting. This is an instance where priming with an
airbrush really pays off; there is no way I could have primed the
interior with a spray can. After I allowed to the primer to cure for 24
hours, I gave the entire interior a couple of coats of my chosen
interior green color: a 1:1 mix of Vallejo Model Air Pale Green and
Vallejo Model Air US Grey Light. I chose this color based on the
interior of modern APCs and IFVs, which are a light greenish color. I
gave everything a coat of Future and after that dried, a wash of 502
Abteilung Starship Filth and then cleaned up the excess with a makeup
applicator and odorless turpenoid. This was the result:


After
the oil dries overnight, I will seal it in with matte varnish and begin
painting the details by hand. I will also spray the the metal grating
with VMA Gunmetal just for a little variation. After the details are
painted, I will give the interior a little bit of sponge weathering and
some pigments before it gets closed up.