Sunday, November 30, 2014

Model Kit Review: Bandai 1/12 Darth Vader

BACKGROUND

 There is no denying that Darth Vader is one of cinema's most iconic villains: cloaked in black, face hidden behind a sinister mask, and armed with an powerful knowledge of the Force and piloting skill matched by no one, this Dark Lord of the Sith will stop at nothing to bring the enemies of the Empire to justice.

His unforgettable appearance was designed by the legendary conceptual artist Ralph MacQuairre, though the mask was originally designed to only be used as a spacesuit and was not part of the normal costume for the character. Luckily, it was decided to make his mask/suit part of the character and his terrible visage was forever cemented in to cinema history!

THE KIT

This is one of three new offerings from the Japanese company Bandai after they assumed the Star Wars license from Fine Molds following the sale of Lucasfilm to The Walt Disney Company in 2012 to the tune of over $4 billion. Bandai is best know for making Gundam model kits and is well known within the modeling community for producing kits the "Bandai Way": intricate (sometimes over) engineering, multicolor molding, and snap together assembly. The question is, how does that translate to the world of Star Wars?

The kit comes on six sprues molded mainly in black (for obvious reasons!), with the pieces having either a high gloss or satin finish, depending on where the piece goes on the finished model. There is also a clear red piece for the lightsaber blade and a dark gunmetal piece for his shoulder armor. The kit is also supplied with a base resembling the floor of the Death Star and both waterslide decals and stickers to use on the kit. The detail on the pieces is fantastic with fine casting on the padded parts of his armor and sharp detail on the mask and chest. The cape may be the only weak part of the kit as it is solid plastic, making it unable to flow like a real cape. However, it is molded in several pieces so hopefully that will make up for an apparent lack of movement. This kit can be built with absolutely no painting, but should the modeler choose to add paint, Bandai has give a short color call out on in the building instructions.

THE VERDICT

Even without having built this kit, it definitely appears to be a solid addition to any Star Wars modeler's collection. This kit would look great built straight out of the box, but an experienced modeler could have a field day making the small improvements needed to this kit to make it truly worth of the Dark Lord of the Sith!

Thursday, November 27, 2014

Showcase: Vampire Counts Mortis Engines

The client was very happy with the way they turned out. In the end, there are some things I would have improved upon, mainly the metallics on the ghost swarm weapons. It should be noted, however, that I went back and added a black wash followed by a light rusty wash on the weapons/armor after I took these pictures. Even after I did that, I still would have like to improve it some more. Unfortunately, going above and beyond must sometimes be sacrificed to meet a deadline (which kills me because I'm a perfectionist). I took these pictures of the morning I handed them over to their owner and I didn't have a chance to take new ones (it's also why the first picture is slightly out of focus).


Friday, October 3, 2014

seaQuest DSV


This model showed up at my house today. For those of you who don't remember, seaQuest DSV was a short lived, yet stellar, science fiction series that first aired on NBC in 1993. It only lasted three seasons before NBC canceled it, but the first season is superb and is a major part of why I grew up loving science fiction.

I found this model on eBay shortly after learning that it existed; I had stumbled upon while search the internet for out of production models. I managed to find a person on eBay selling this model for less than half what others were selling it for so I snatched it up.

I will be entering it in the Scale Model Addict Winter Group Build (Modeling the Movies & TV).

Saturday, September 20, 2014

WIP: Space Marine Stormraven, Part 3

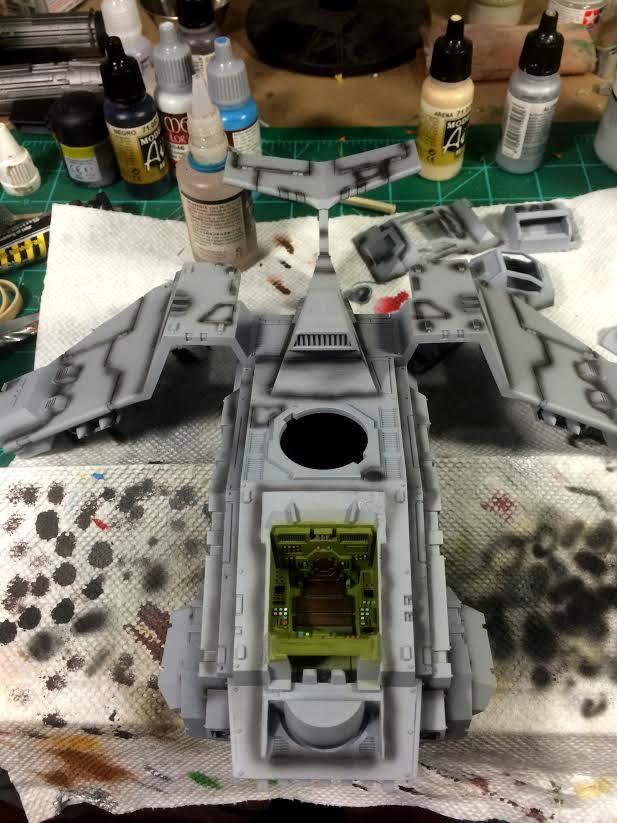
When we last left the Stormraven, a freshly laid coat of Tamiya Surface Primer was drying on the model. After it was cured, I used some Tamiya Liquid Surface Primer to fix a couple of spots I was unhappy with and after it was sanded down I reapplied some primer over the areas in question. After that, it was time for some preshading with VMA Black.


Preshading is a technique that makes use of the idea that an airbrush applies thin layers of paint. By darkening areas of the model with your desired color, you can affect the color of the basecoat by allowing some of the preshaded areas to show through the top coat. This can be adjusted depending on how much paint is applied on the topcoat. The result is subtle shading on the model that can bring depth to panel lines and shadows.

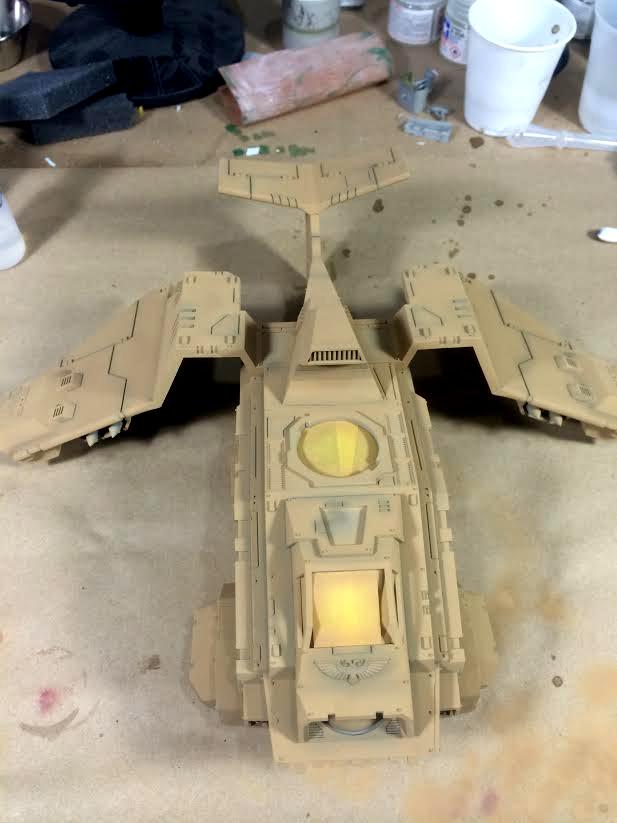
I then laid down the base color, again using Tamiya Desert Yellow (XF-59) like the Stormtalons that will be on the tabletop along with this model. Tamiya paints airbrush extremely smooth and leave an extra matte finish; the only downside is that they model is vulnerable to fingerprints, making gloves a necessity.


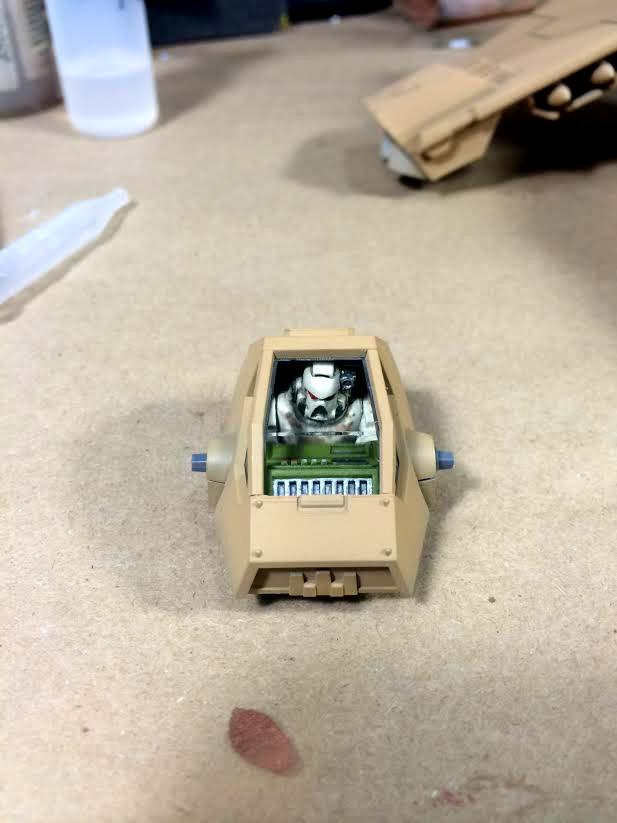
The client also requested a slight conversion to the model: replace the gun servitor in the turret with a Guardsmen or marine. I agree that it makes little sense that space marines would use a mindless servitor to man the gun on a craft like this. I raided my bits box and after some heavy modification, I managed to cram a space marine into the gun turret.


The engines and other metallic details were painted using a 1:1 mix of VMA Aluminum and VMA Black and along with the rest of the model, are awaiting a coat of Future in preparation of an oil wash and weathering.


Thursday, September 18, 2014

Model Kit Review: Pegasus Hobbies 1/1400 N.S.E.A. Protector

BACKGROUND

Never give up, never surrender!
 Released in 1999, the movie Galaxy Quest follows the adventures of the washed up cast of the eponymous television show almost 20 years after its cancellation. Scraping by making a living at fan conventions and store grand openings, they are whisked in to space by their on screen commander and de facto lead, Jason Nesmith (Tim Allen), after a group of aliens enlist his help when they mistake him for the character he played on the show, Cmdr. Peter Quincy Taggart. The aliens, known as Thermians, while gifted in science and engineering, have no concept of fiction and believe that the cast and the show are historical documents, basing their entire society on the show. When the cast quickly is over their heads, they rely on the help of a small group of superfans with intricate knowledge of the show. The product was a brilliant satire on Star Trek and scifi fandom at large and the movie quickly became a cult classic.

Guided by the television show, the Thermians build a working version of Cmdr. Taggart's ship, the NTE-3120 N.S.E.A Protector, copying it exactly how it appears on screen. An Evolution-class heavy cruiser, the Protector serves as the flagship of the National Space Exploration Administration and is the most powerful starship built by humanity. Though built for the peaceful exploration of space, the Protector is host to a vast array of powerful weapons, inculding resonance cannon batteries, quantum rockets, pulse catapults, and it's primary weapon: a blue particle cannon.

THE KIT


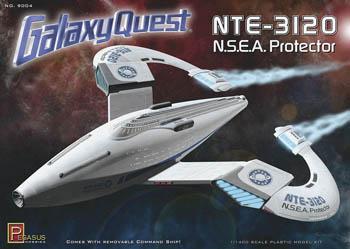
 This 1/1400 scale kit comes with four sprues containing the wings, command deck, and the hull molded in grey styrene. Also supplied is one sprue cast in clear blue that are used in the engines; a nice touch for those who are looking to light the kit. The kit also comes with a Galaxy Quest logo base.

When making this model, Pegasus was given access to the three studio models produced by Industrial Light & Magic; in fact, one model used to hang in the ILM model making studio offices until they closed their doors in 2011. This kit is the same size as the model used in the movie during scenes showing the "classic" TV show, technically making it a studio scale model. However, the details were based off the larger models used in the movie making it a fine looking model. The paint scheme is rather simple, consisting of mostly white and light greys, but a seeing the close ups of the ship in the movie reveals a nice Aztec pattern on the hull. Recreating it should add a little bit of visual interest.

VERDICT

Overall, this kit is definitely a solid buy! This would make an excellent addition to the display cabinet of any science fiction fan. If the adventurous modeler was in the mood to add lights, there is also a photo etch set available from ParaGrafix that has some nice grilles to add to the engines.

Tuesday, September 16, 2014

Model Kit Review: Fine Molds 1/72 Slave I

BACKGROUND

Slave I is easily one of the most iconic ships from the original Star Wars trilogy. The personal starship of the enigmatic bounty hunter Boba Fett, it first appeared in The Empire Strikes Back where Fett used it to track Han Solo to Cloud City on the planet Bespin.

The ship began its life as a Kuat Systems Engineering Firespray-31 patrol and attack craft before being stolen by the bounty hunter Jango Fett. After his death during the Battle of Geonosis, the craft was passed to his son, Boba, who would use it to great effect during his career as one of the most notorious bounty hunters in the galaxy. While in possession of the Fett's, the craft was given numerous upgrades to its engines, avionics, and weapon systems. The upgrades to its engines gave it sublight speeds rivaling that of the BTL Y-wing starfighter, an impressive feat for a ship this large, while the upgrades to the sensors and jamming array made the ship invisible to other starship sensors, allowing Fett to easily slip into the most secured areas. Most importantly, the weapon system was expanded to allow the ship to equip proton torpedoes, concussion missiles, Void-7 seismic charges, and an ion cannon in addition to the standard heavy blaster cannons: an impressive amount of firepower contained in one ship.

THE KIT


This kit was the seventh entry into Fine Molds outstanding line of Star Wars model kits and their second large ship model kit, after their impressive Millennium Falcon kit. Like the majority of other kits in this range, Slave I is finely molded in a light grey styrene and nearly devoid of flash or mold lines. Injector pin marks are only on areas that will not be visible when the model is complete, meaning almost no filling and sanding is needed. The only major seam on this kit runs down the middle of the hull where the two halves are joined; filler is a must to eliminate the seam. Luckily, there are few panel lines in this area so sanding them down shouldn't prove much of a problem, especially if you are careful. This is a large kit: there are ten sprues, including the one that contains a stand for the model to be displayed in its upright flying position. Also included are two Boba Fett miniatures: a seated one for the cockpit and a standing one to attach to the base. There is also one small decal sheet that contains the small yellow, white, and burgundy markings found on the ship. The kit is also supplied with extensive color-printed painting guide, a nice touch considering most of the time spent completing this model will be used replicating the complicated color scheme. Since this was a first production kit, it also came with a limited edition Han Solo frozen in carbonite cast in white metal. This addition will no doubt look great positioned next to Boba on the display base!

VERDICT

I think it goes without saying that Fine Molds hit this one out of the park. Between the superb engineering and the intricate details, this kit is outstanding. It is a kit truly worthy of the most feared bounty hunter in the Galaxy!

Sunday, September 14, 2014

WIP: Space Marine Stormraven, Part 2

After the oil paint had dried, I sealed everything in with matte varnish to protect it from the next layer of work to go in. I painted the steel grating with a 1:1 mix of Vallejo Model Air Steel and VMA Black, which as slowly become my go-to color for steel. I then painted all of the various details like the seats and the computer panels. I would normally do a gem effect for the screens like I did with my Land Raider, but given the fact that the interior was already assembled and getting my airbrush to the right angle would prove tricky, I just left them black. I then did two layers of sponge weathering, first using VMA Camo Black Brown and the second layer with VMA Black. I used various earth tone pigments to simulate dirt and followed everything up with some Tamiya Gun Metal pigment for the most worn corners and Tamiya Steel pigment for the metal grating.


I assembled the two hull pieces and glued them together with Tamiya Extra Thin cement and allowed it to dry using rubber bands to hold everything together. I then gave the entire model a coat of grey Tamiya Surface Primer from a rattle can. This primer is fast drying and gives a wonderful surface to work on. I chose the rattle can as opposed to my airbrush because of the large surface area of the model and because it takes to sanding much better than Vallejo Surface Primer. This is important because there are already a couple of areas that will require more filler and sanding.